Our top 10 Picnic Tips

kiwis love a picnic and we’re spoilt for choice when it comes to location with all our beautiful parks and beaches. read on for our tips on how to make the most of your time spent eating outside.

  1. It may seem obvious but you should check the weather a few days in advance. If it looks questionable and you still want to go choose somewhere which has tables undercover. Take a pack of cards or a board game to play. Also have a back-up plan so the kids don't get too disappointed if you can't go on the day. A picnic on the lounge room floor is a fun alternative if it's raining.

  2. There is no place for plastic disposables in 2020! Op shops are a great place to buy cheap metal utensils to keep in your picnic basket. You will also be able to find picnic basics like bottle openers, a sharp knife, breadboard, and plates there as well. Op shops have remnants of fabric which can be made/cut into cloth napkins. After the picnic take them home and wash to be reused instead of throwing away disposable paper ones.

  3. If you don't have a waterproof backed picnic blanket laying down a tarpaulin or thick woollen blanket first will keep any damp from seeping through. Bring along some cushions for lounging back on after the meal is finished.

  4. Pre-make as much food as possible and keep it simple.

    ~Long baguettes can be filled with chutney and cheese and sliced up to be filled with salad when ready to eat.

    ~Avoid leafy salads and stick to chunky hard vegetables.

    ~Rice paper rolls with dipping sauce.

    ~Cold quiche.

    ~Hand pies.

    ~Corn on the cob.

    ~Savoury muffins.

    ~Scones.

    ~Hummus and veggie sticks.

    ~Potato or pasta salad.

    ~Whole fruit like apples, mandarins, grapes, strawberries, watermelon and avocados are convenient.

    ~Sweet treats which travel well like biscuits, dry slices and bliss balls.

  5. Empty egg cartons are fabulous for transporting softer treats like little cakes, tarts, filled eggs and the like because they keep them separate and protected.

  6. Make sure your picnic spot has shade. If not pack umbrellas or one of the many portable shelter options out there.

  7. The mozzies love picnics too! Insect repellent is a must. And it also wouldn’t hurt to pack the first aid kit too.

  8. Freeze drink bottles the night before and put them in with the food before you leave. They will keep the food fresh and cool and you get to sip on icy water as they defrost. Also pack damp flannels in recycled bags or wet bags to wipe grubby hands and faces.

  9. Take wet bags for dirty used cutlery and plates. And remember to take all rubbish home with you. Anything which can be composted can go home in empty containers to be put on the compost heap.

  10. Consider how far you will be walking with all your picnic gear. A great option is a trolley/beach cart/ or wagon to simply put everything into and pull it along. You’ll have the kids fighting over who gets to pull it. Parenting win right there!

Easy festive vegan fudge recipe

DSCF3022.jpg

Hey team,

Christmas is just around the corner so we wanted to share this super easy, one pot, three ingredient fudge.

Wrap it up in cellophane and tie with a pretty ribbon for gifts, store it in the freezer for when unexpected guests pop round over the festive season, or (our favourite) you could hide it at the back of the fridge behind the empty sauce bottle and mummified lemon, where no one but you knows it’s whereabouts… Fudge? What fudge?

INGREDIENTS:

~One can of Nature’s Charm sweetened condensed coconut milk

~400-450grams of Chantal dark 70% vegan chocolate chunks

~Two tablespoons of Chantal Organics coconut oil

~Nuts to decorate (optional)

METHOD:

~In a pot combine condensed coconut milk, chocolate chunks and coconut oil. And melt together over low heat.

~Stir continuously so the mixture doesn’t catch and burn.

~Once melted and glossy pour the mixture into a lined square cake or loaf tin.

~Sprinkle mixed nuts on top if using.

~Place in the fridge until set. About 30 minutes.

~Slice into squares and store in an airtight container in the fridge.

DSCF3027.jpg

Stevie's Eighty Dolla Holla!

We set our buddy Stevie a challenge. Eighty dollars to spend in store to see how far she could make it stretch - the eighty dollar holla was born. This challenge has come at a time when we are all going with less, using up what’s in the cupboards, making more meals from scratch, and spending more time in our kitchens due to lockdown.

Read on to see Stevie’s amazing results. She has shown you can eat wholesome, nourishing food on a budget. She created 15 recipes, and fed over 50 mouths - her lucky flatmates on repeat!

 
dal.jpg

DAL BHAT

While travelling in Nepal I fell in love with the simplicity that is Dal Bhat. Literally translating to lentils and rice, it's as nutritionally adequate as it is delicious. Upon returning back to New Zealand I found it falling into my heavy rotation of weeknight recipes.

Serves 6

GF, RSF, V

INGREDIENTS

Neutral oil like coconut, canola or sunflower

2 small or one medium onion

2 cloves of garlic

1 thumb of ginger

1 tsp coriander (seeds or ground)

1 tsp cumin (seeds or ground)

1 tsp turmeric

1/2 tsp of chilli

2 medium potatoes (washed with the skin on)

1 C red lentils

1 tin of Chantal Organics chopped tomatoes

1 bunch of caveloro nevro

3 cups water or veggie broth (homemade or from the bulk bins)

Salt and pepper to taste

2C rice, 3C water

METHOD

  • Dice onions, cube potatoes and finely chop garlic and ginger

  • Place a heavy bottomed pan on a med-high heat and add a good glug of oil

  • To a medium sized saucepan on a high heat add rice, water and a good pinch of salt

  • Keep the lid on the pot of rice till boiling, give it a good stir then turn the heat off, leaving the pot on the element while keeping the lid on

  • This is the ‘absorption method’ and makes for super fluffy rice 

  • Add the onions to the now-hot pan and saute for a minute or two

  • Add the garlic and ginger and continue to saute for a further few minutes

  • Add the coriander, cumin and chilli and saute while stirring, after another minute add the turmeric

  • Add in the potatoes and lentils and fry in the spices for a further few minutes

  • Add in the tin of Chantal Organics chopped tomatoes and veggie broth or water

  • Allow the curry to simmer for 15-20 minutes or so to cook the potatoes and lentils and reduce to desired consistency

  • A few minutes before serving stir in a bunch of chopped cavolo nero (or any green of choice), so that it gets nice and wilty without losing its colour, flavour and nutrients.

  • Season with salt and pepper, and serve.

 
IMG_2222 (1).jpg

Black bean and pumpkin chilli

with cashew sour cream

Serves 4

GF/RSF/V

INGREDIENTS

Oil to cook in

1 medium onion

1 medium carrot

1 capsicum

2 cloves of garlic

2 tsp Paprika

½ tsp Chilli

1 tsp Cumin powder

1 tsp Coriander powder

Salt and pepper to taste

¼ of a pumpkin (about 1 cup, roughly chopped, could also be subbed for kumara)

1 tin of Chantel Organic Black Beans

1 tin of Chantel Organic Tomatoes

750ml veg stock (homemade or from the bulk bins)

Bunch of kale (or green of choice)

Small bunch of fresh coriander

For Rice and Quinoa

¾ C white rice

¾ C quinoa

2 ¼ C water

Pinch of salt

For the Cashew Sour Cream

½ C raw cashew pieces, soaked

½ C raw sunflower seeds, soaked

Juice of ½ a lemon

Salt to taste

¼ - ½ C water, depending on capabilities of blender and desired consistency 

METHOD

  • Soak your sunflower seeds and cashews (10+ mins in boiling water or 2+ hours in cold water)

  • Dice up your onions, carrots and capsicum to relatively similar sized pieces

  • Finely chop garlic

  • Roughly chop pumpkin

  • Add the rice, quinoa, water and salt to a saucepan with a lid on a high heat. Once boiling remove the lid and give it a stir. Put the lid back on and turn the element off leaving pot on the still-hot element

  • Add oil to a soup pot on a medium-high heat

  • Once hot add you onions, carrots and capsicum and fry for a few minutes, stirring frequently till onions are translucent

  • Add garlic, cumin and coriander powder, paprika, chilli, salt and pepper and fry for a few more minutes, stirring frequently

  • Add in the pumpkin and fry for another minute or two

  • Drain and rinse your Chantel Organic black beans and add them to the pot along with a tin of Chantal Organics crushed tomatoes and the vegetable stock 

  • To a blender add rinsed and drained soaked cashews and sunflower seeds, lemon juice, salt and about half of the water

  • Blend up adding the water as you go, but as little as possible. The less water you have the thicker and more sour-cream-like the consistency will be. Adjust lemon and salt ratios to your palate

  • As the pumpkin cooks and the liquid begins to thicken up dice up the kale and coriander (reserving some coriander to garnish) and stir through, by adding them last to cook minimally you preserve the nutrients in the vegetable

  • To serve dish up the rice-quinoa mix into a bowl with the chilli on top and then a blob of sour cream with coriander to garnish

 
stock.jpg

Vegetable stock

When cooking, to get the most flavour out of my veggies I often make a quick stock using the tops, tails and skins of whatever I have just prepped for the recipe, and a bay leaf. I use this in place of water in recipes 

Can include but not limited to -

Onion skin and ends

Garlic peel

Ginger peel

Carrot peel and ends

Celery

Tomatoes

Herbs

Pumpkin peel and pulp

Chilli

Capsicum

Literally anything you’re about to put in the compost, as long as it’s clean.

METHOD

  • Boil this in enough water to cover it for as long as you can before you need to use it in the recipe. The longer it’s boiled for the more flavour the stock will have. It also makes for good prep habits in making sure all your veg is ready to go before you start cooking.

 
wedges.jpg

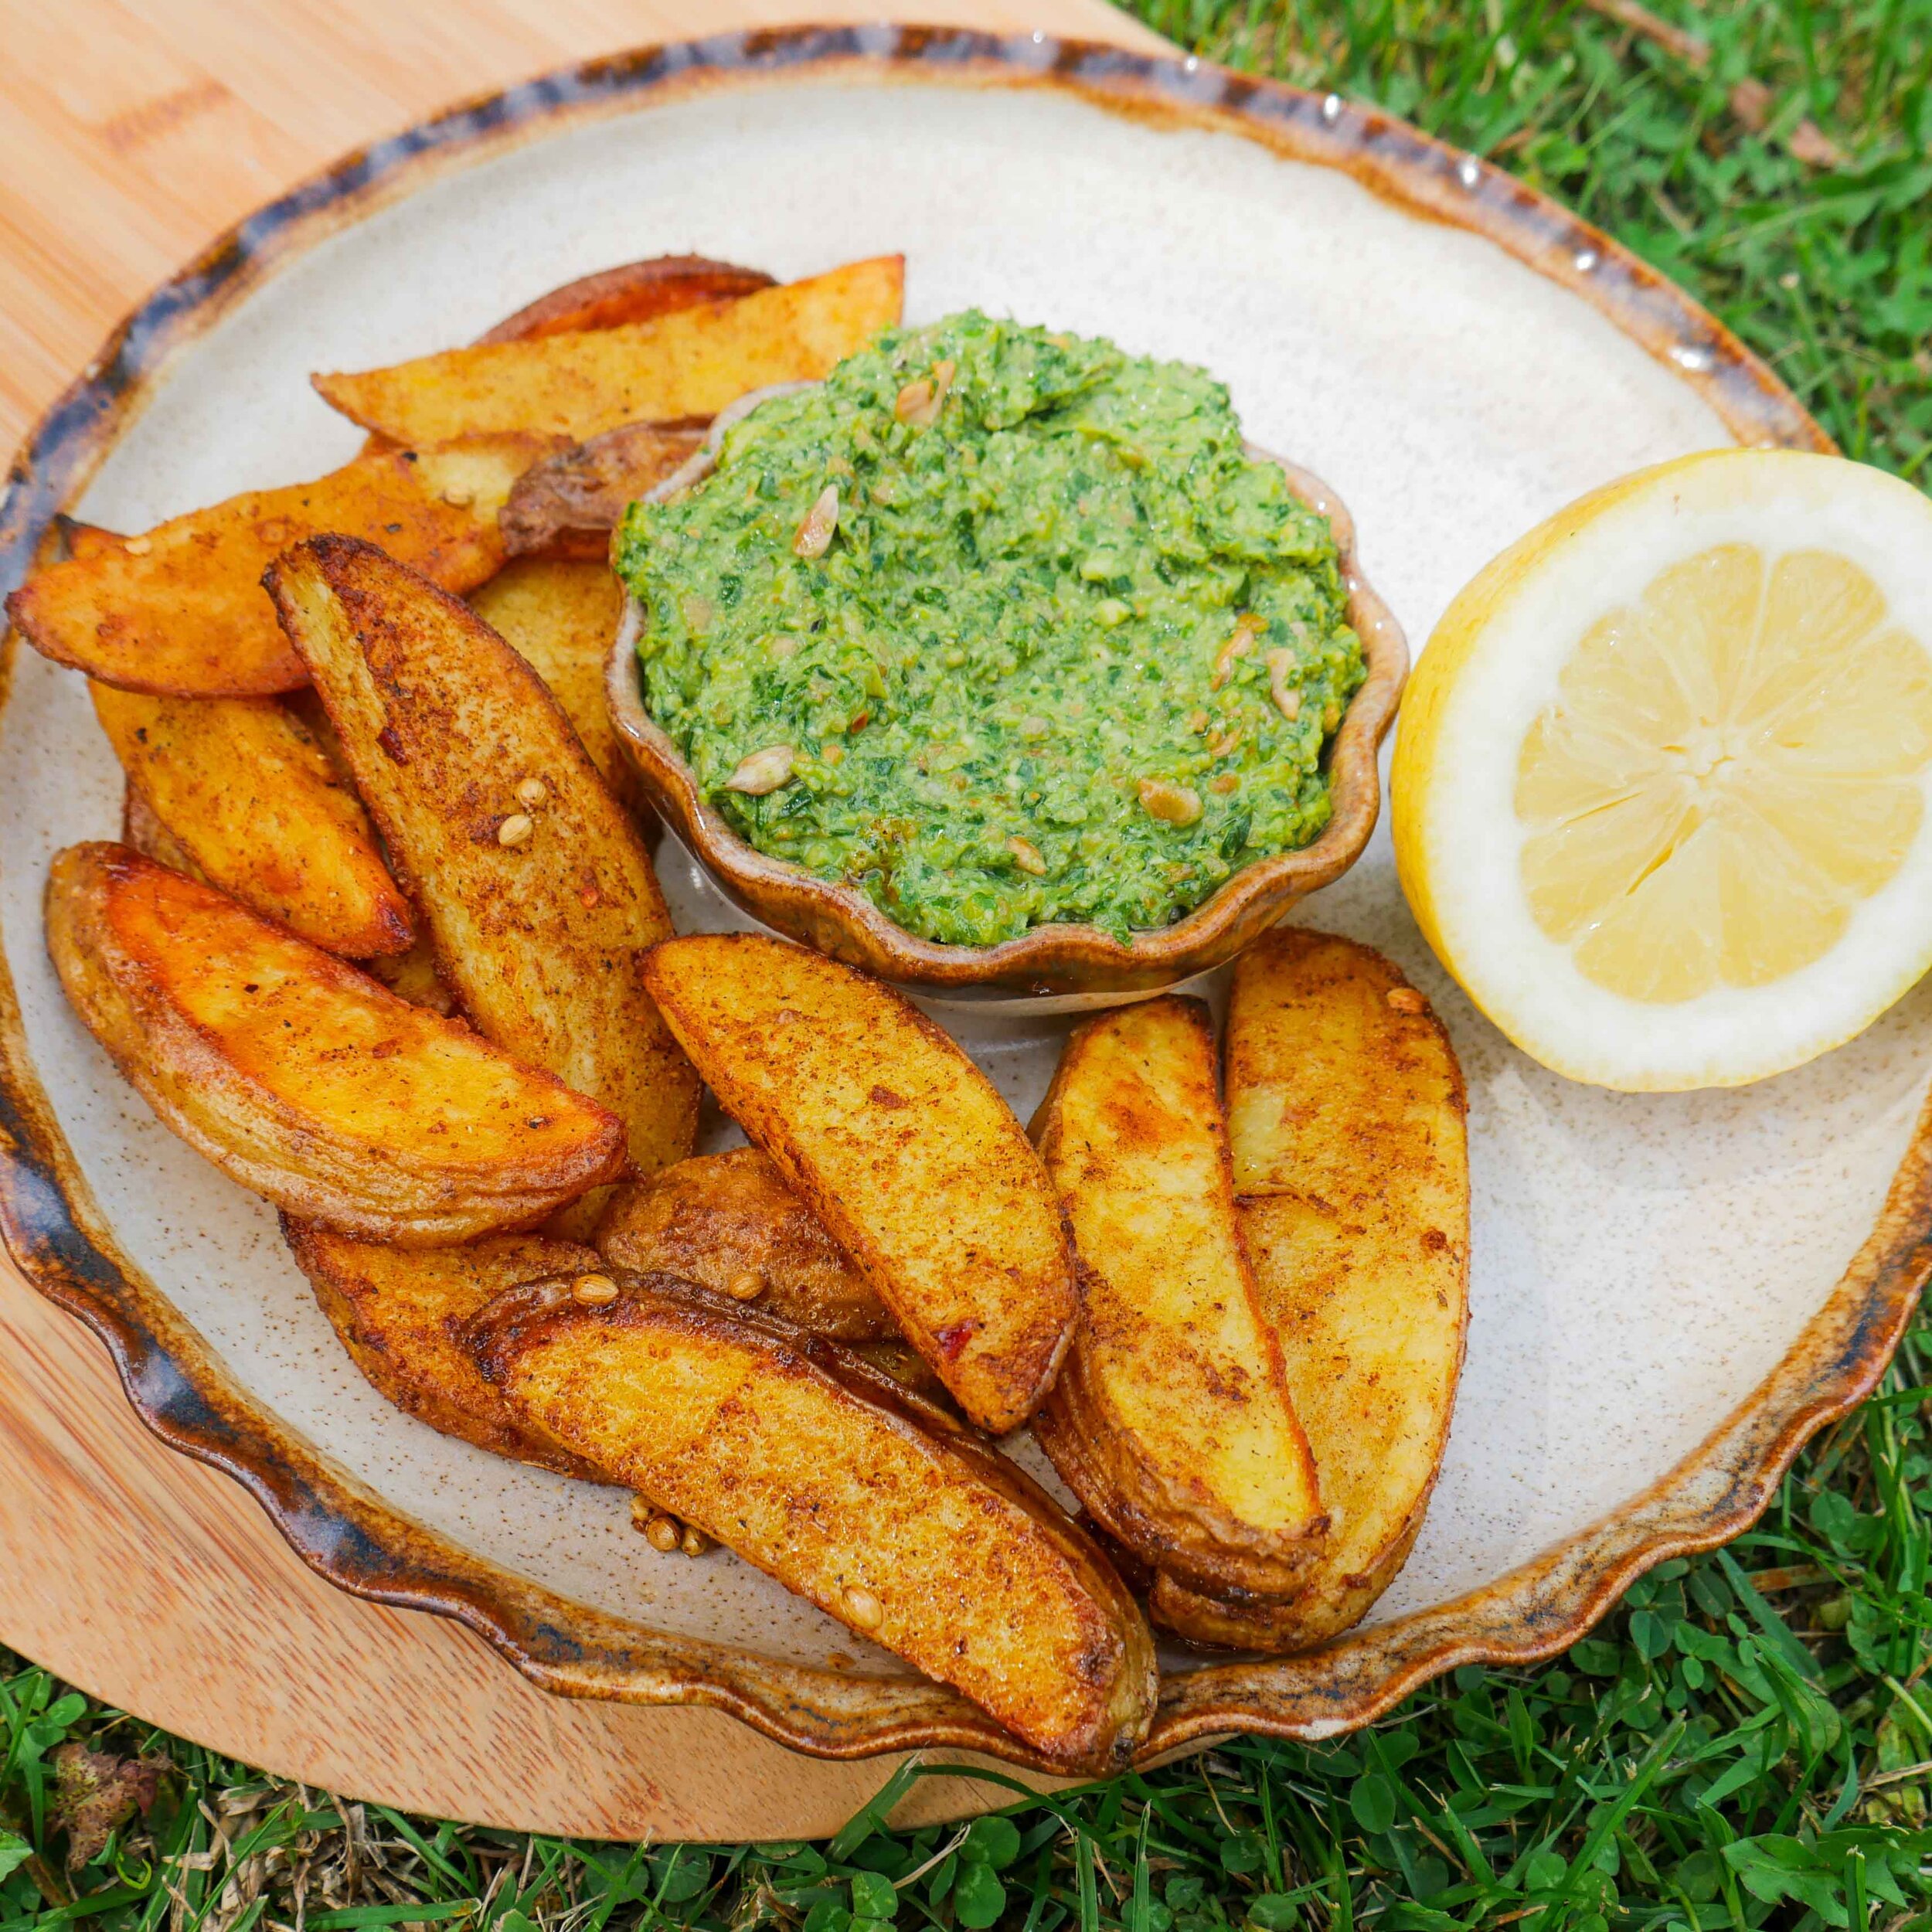
spicy wedges

and green pesto.

Serves 1

GF, RSF, V

WOULD NOT recommend serving these together, but for the purpose of a pretty photo, and I was using up the last of my ingredients from this challenge they have appeared together. Both delicious in their own right though.

PESTO.

INGREDIENTS

One handful of spinach leaves - about 150g (you could also use kale, silverbeet, basil ect, or a mixture) 

¼ C roasted sunflower seeds

¼ C roasted cashew pieces

Juice of ½ a lemon

2 cloves of garlic

¼ C oil

Salt and pepper to taste

METHOD

  • Put all ingredients into a blender cup (except for oil and half the cashews)

  • Blend on a low speed, scraping down the sides frequently

  • Add oil as you go, only when the mixture needs a little more liquid to keep moving

  • You want the end result to be quite fine, add the remaining cashews closer to the end to have a bit of texture variation.

  • Serve as a dip for crackers or stir through pasta for an easy sauce.

WEDGES (quantities for 1)

INGREDIENTS

2 medium potatoes per person

½ tsp coriander seeds or ground

½ tsp cumin seeds or ground

½ tsp paprika

¼ tsp chilli flakes

Salt and pepper

Oil to cover

METHOD

  • Preheat oven to 200C.

  • Wash potatoes and cut into wedge-like shapes.

  • Put the potato wedges on an oven tray, and cover with oil and all the seasonings.

  • Toss them with your hands to make sure everything is covered and spread out evenly on the tray in a single layer.

  • Bake for 25-35 mins depending on how crispy you like em.

 
curry.jpg

CHICKPEA and cashew makhani

with rice.

Serves 4

GF, RSF, V

INGREDIENTS

Oil to cook in

2 small or 1 medium onion

2 cloves of garlic

1 thumb ginger

1 tsp garam masala

1 tsp turmeric

½ tsp coriander

½ tsp cumin

½ tsp chilli

1 C cashew pieces, soaked

1 tin Chantal Organics chopped tomatoes

1 ½ C stock or water

1 tin chickpeas, drained and rinsed or 1 ½ C chickpeas prepared from dry

Small handful of fresh coriander to garnish

1 C rice

1 ½ C water

Pinch of salt

METHOD

  • Add the rice, water and salt to a medium sized saucepan with a lid and put on a med-high heat

  • Once boiling, turn the heat off, remove the lid and give the rice a stir making sure nothing is sticking to the bottom.

  • Soak your cashew pieces in enough water to cover them (10+ mins in boiling water or 2+ hours in cold water)

  • Chop onions and finely chop garlic and ginger.

  • Replace the lid and leave on the turned off but still hot element to absorb and cook through.

  • Put a pan on a medium-high heat with 2 tablespoons of oil.

  • Fry onions for a minute before adding garlic and ginger.

  • After another minute of frequent stirring add in garam masala, coriander, cumin and chilli, and 30 seconds later, the turmeric.

  • Fry for one more minute then add the onion and spice mix to a blender cup along with the tin of Chantal Organics chopped tomatoes and stock/water.

  • Drain and rinse the soaked cashews and add them to the blender cup as well.

  • Blend until a silky smooth consistency is reached and pour mixture back into the pan and return it to a med-low heat.

  • Add the chickpeas to the cashew gravy mix and let it simmer for a few minutes to heat through and reduce the sauce to a thicker consistency.

  • Serve over rice and garnish with chopped fresh coriander.

 
soup.jpg

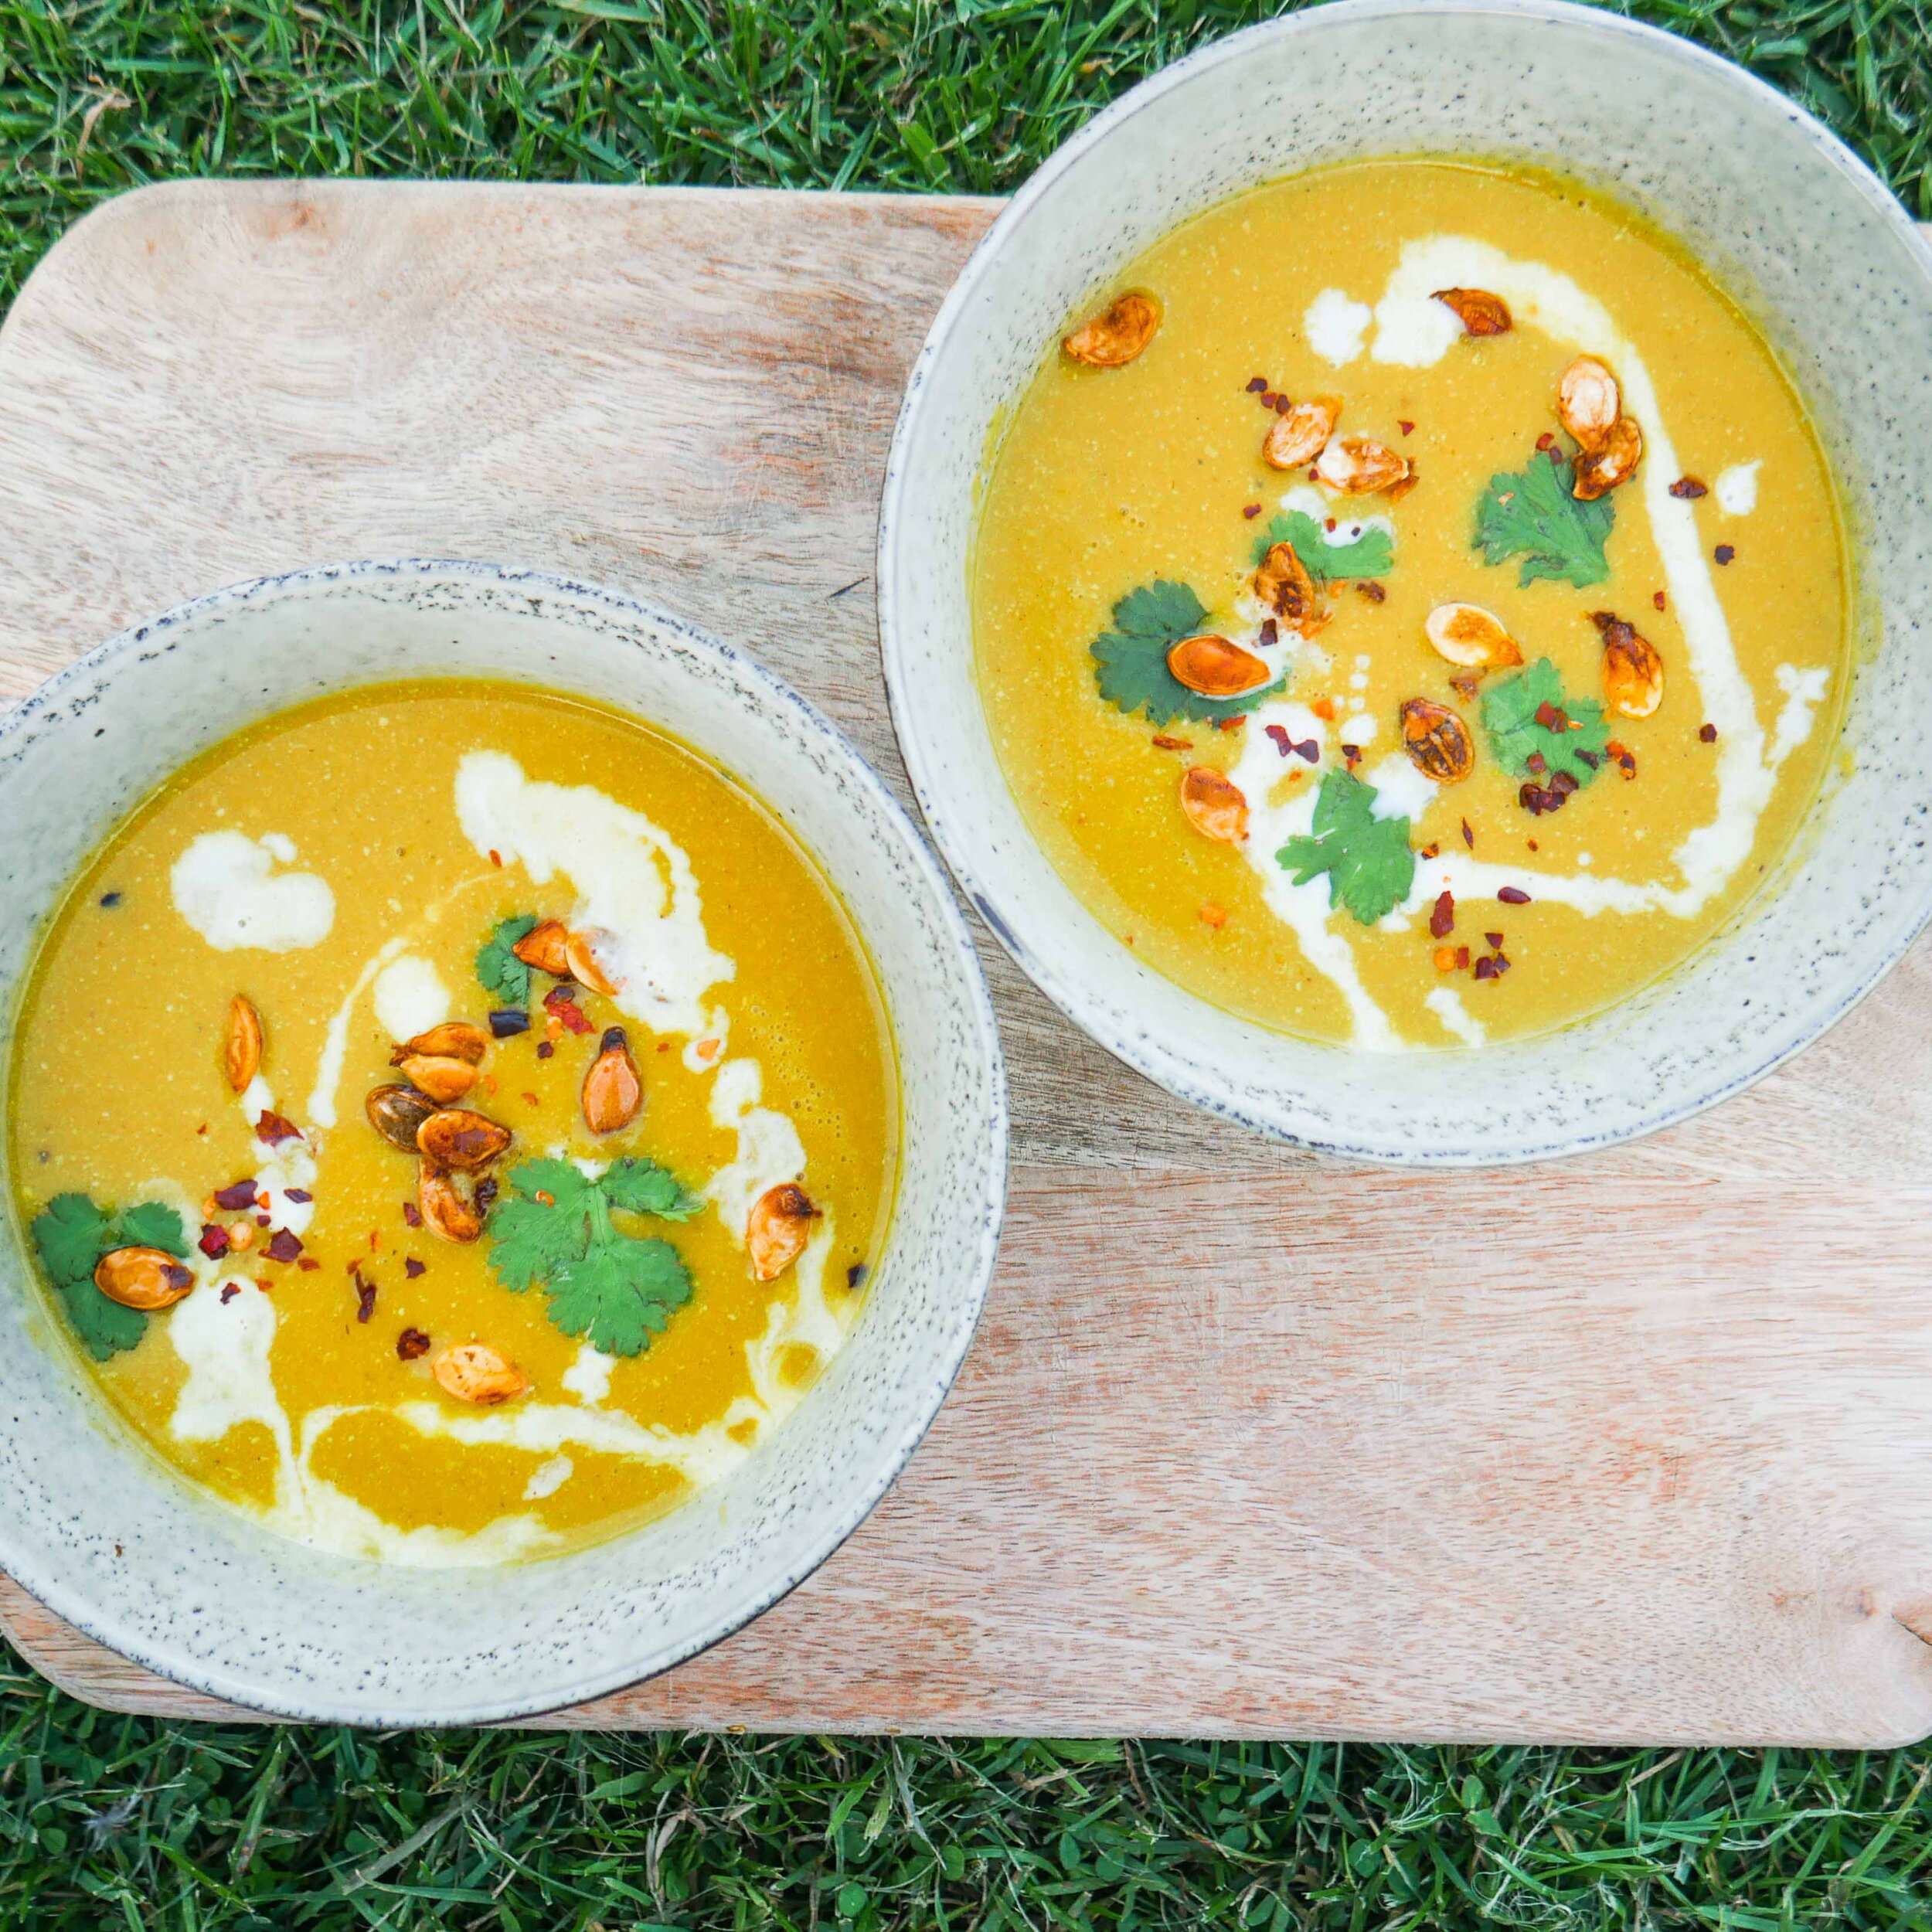
spicy pumpkin soup

rich in protein.

Serves 6

GF, RSF, V

INGREDIENTS.

¾ of a medium sized pumpkin - aprox 4 cups in small cubes (you could easily use a whole pumpkin and adjust the liquid quantities, I just used ¾ because that’s what I had left from this challenge)

Opt. reserve the pumpkin seeds

2 onions

3 cloves of garlic

1 thumb of ginger

1 C dried red lentils

2 tsp coriander, seeds or ground

½ tsp chilli flakes

2 tsp cumin seeds or powder

1 tin Chantal Organics coconut cream (reserve 2 TBSP for garnish, opt)

700ml-1L veg stock, homemade or from the bulk bins

Fresh coriander to garnish

Oil to cook in

Salt and pepper to taste

METHOD.

  • Preheat oven to 200C

  • Remove seeds from pumpkin and wash, set aside.

  • Remove skin from pumpkin and cut into bite sized chunks.

  • Put pumpkin on baking tray and cover with a generous glug of oil, half the coriander, cumin and chilli and a good sprinkle of salt and pepper.

  • Toss with your hands to make sure everything is evenly coated and pop in the oven for 25 mins or so, till it is cooked through and a little brown on the outside, allow for a few minutes to cool once ready.

  • (opt) Pop seeds in a baking dish and put in the oven underneath the pumpkin, keeping a close eye on them, they will be ready when they’re golden brown and crunchy.

  • While everything is roasting, dice your onions and finely chop garlic and ginger.

  • Heat a good glug of oil in a soup pot on a medium heat.

  • Add onions, and two minutes later the garlic and ginger, stirring frequently.

  • After another minute add remaining spices.

  • Fry all together till the spices become aromatic, another 1-2 minutes.

  • Add in the lentils and continue to stir for another couple of minutes before adding 700ml of veg stock.

  • Allow lentils to cook in this broth, once they’re mushy and cooked through pour the mixture into a blender cup.

  • Blend until smooth (if you prefer some variation in texture you could reserve ⅓ of the mixture to leave chunky)

  • Return to head and stir in one tin of Chantal Organics coconut cream.

  • Season with salt and pepper and serve.

  • Garnish with a swirl of coconut cream, the roasted pumpkin seeds and fresh coriander.

 
pancakes.jpg

blueberry pancakes

with caramel sauce.

These hearty pancakes make for a filling breakfast that will keep you well sustained throughout the day. Stack them up high and serve with caramelised banana, Chantel Organics smooth peanut butter, more blueberries and a healthy drizzle of coconut caramel sauce

RSF, V

INGREDIENTS.

FOR THE PANCAKES

1 ½  C Flour of Choice+ (I used 50/50 *oat and buckwheat flours) 

1 C frozen Blueberries

1TBSP coconut sugar

2tsp baking powder

1 chia/flax egg

¼ C neutral oil (canola, sunflower, grapeseed, coconut ect)

1 ½ C oat mylk

FOR THE CARAMEL SAUCE

1C coconut sugar

½ C mylk (I used 50/50 oat and coconut cream)

Pinch of salt

Neutral oil to cook in 

Peanut butter and banana to serve


METHOD.

  • Add caramel ingredients a saucepan and set on a med-low heat, stirring every 1-2 minutes.

  • Caramel is ready when all the sugar has dissolved and it is your desired thickness ~ it gets pretty thick so remove from heat and set aside straight away once ready.

  • Mix together egg= and allow to sit for a minute or two to get all gloopy.

  • To a large mixing bowl add flour, frozen blueberries, baking powder and sugar.

  • Mix together and make a well in the centre.

  • In another bowl mix together flax egg, oil and mylk.

  • Pour the wet ingredients into the dry and whisk until well combined.

  • Spoon or pour batter into a preheated pan over a medium-high heat, the size of the scoop depending on your desired pancake size.

  • Flip once small bubbles form on the topside of the pancakes and the underside is golden.

  • Pancakes are ready when the second side is also golden.

Notes:

+100% of either or regular white or whole wheat flour would work well

*To make oat flour measure out required amount and blend in a blender until fine flour-like consistency

=1TBSP ground chia/flax mixed with 4TBSP of water is equal to 1 egg

 
oats.jpg

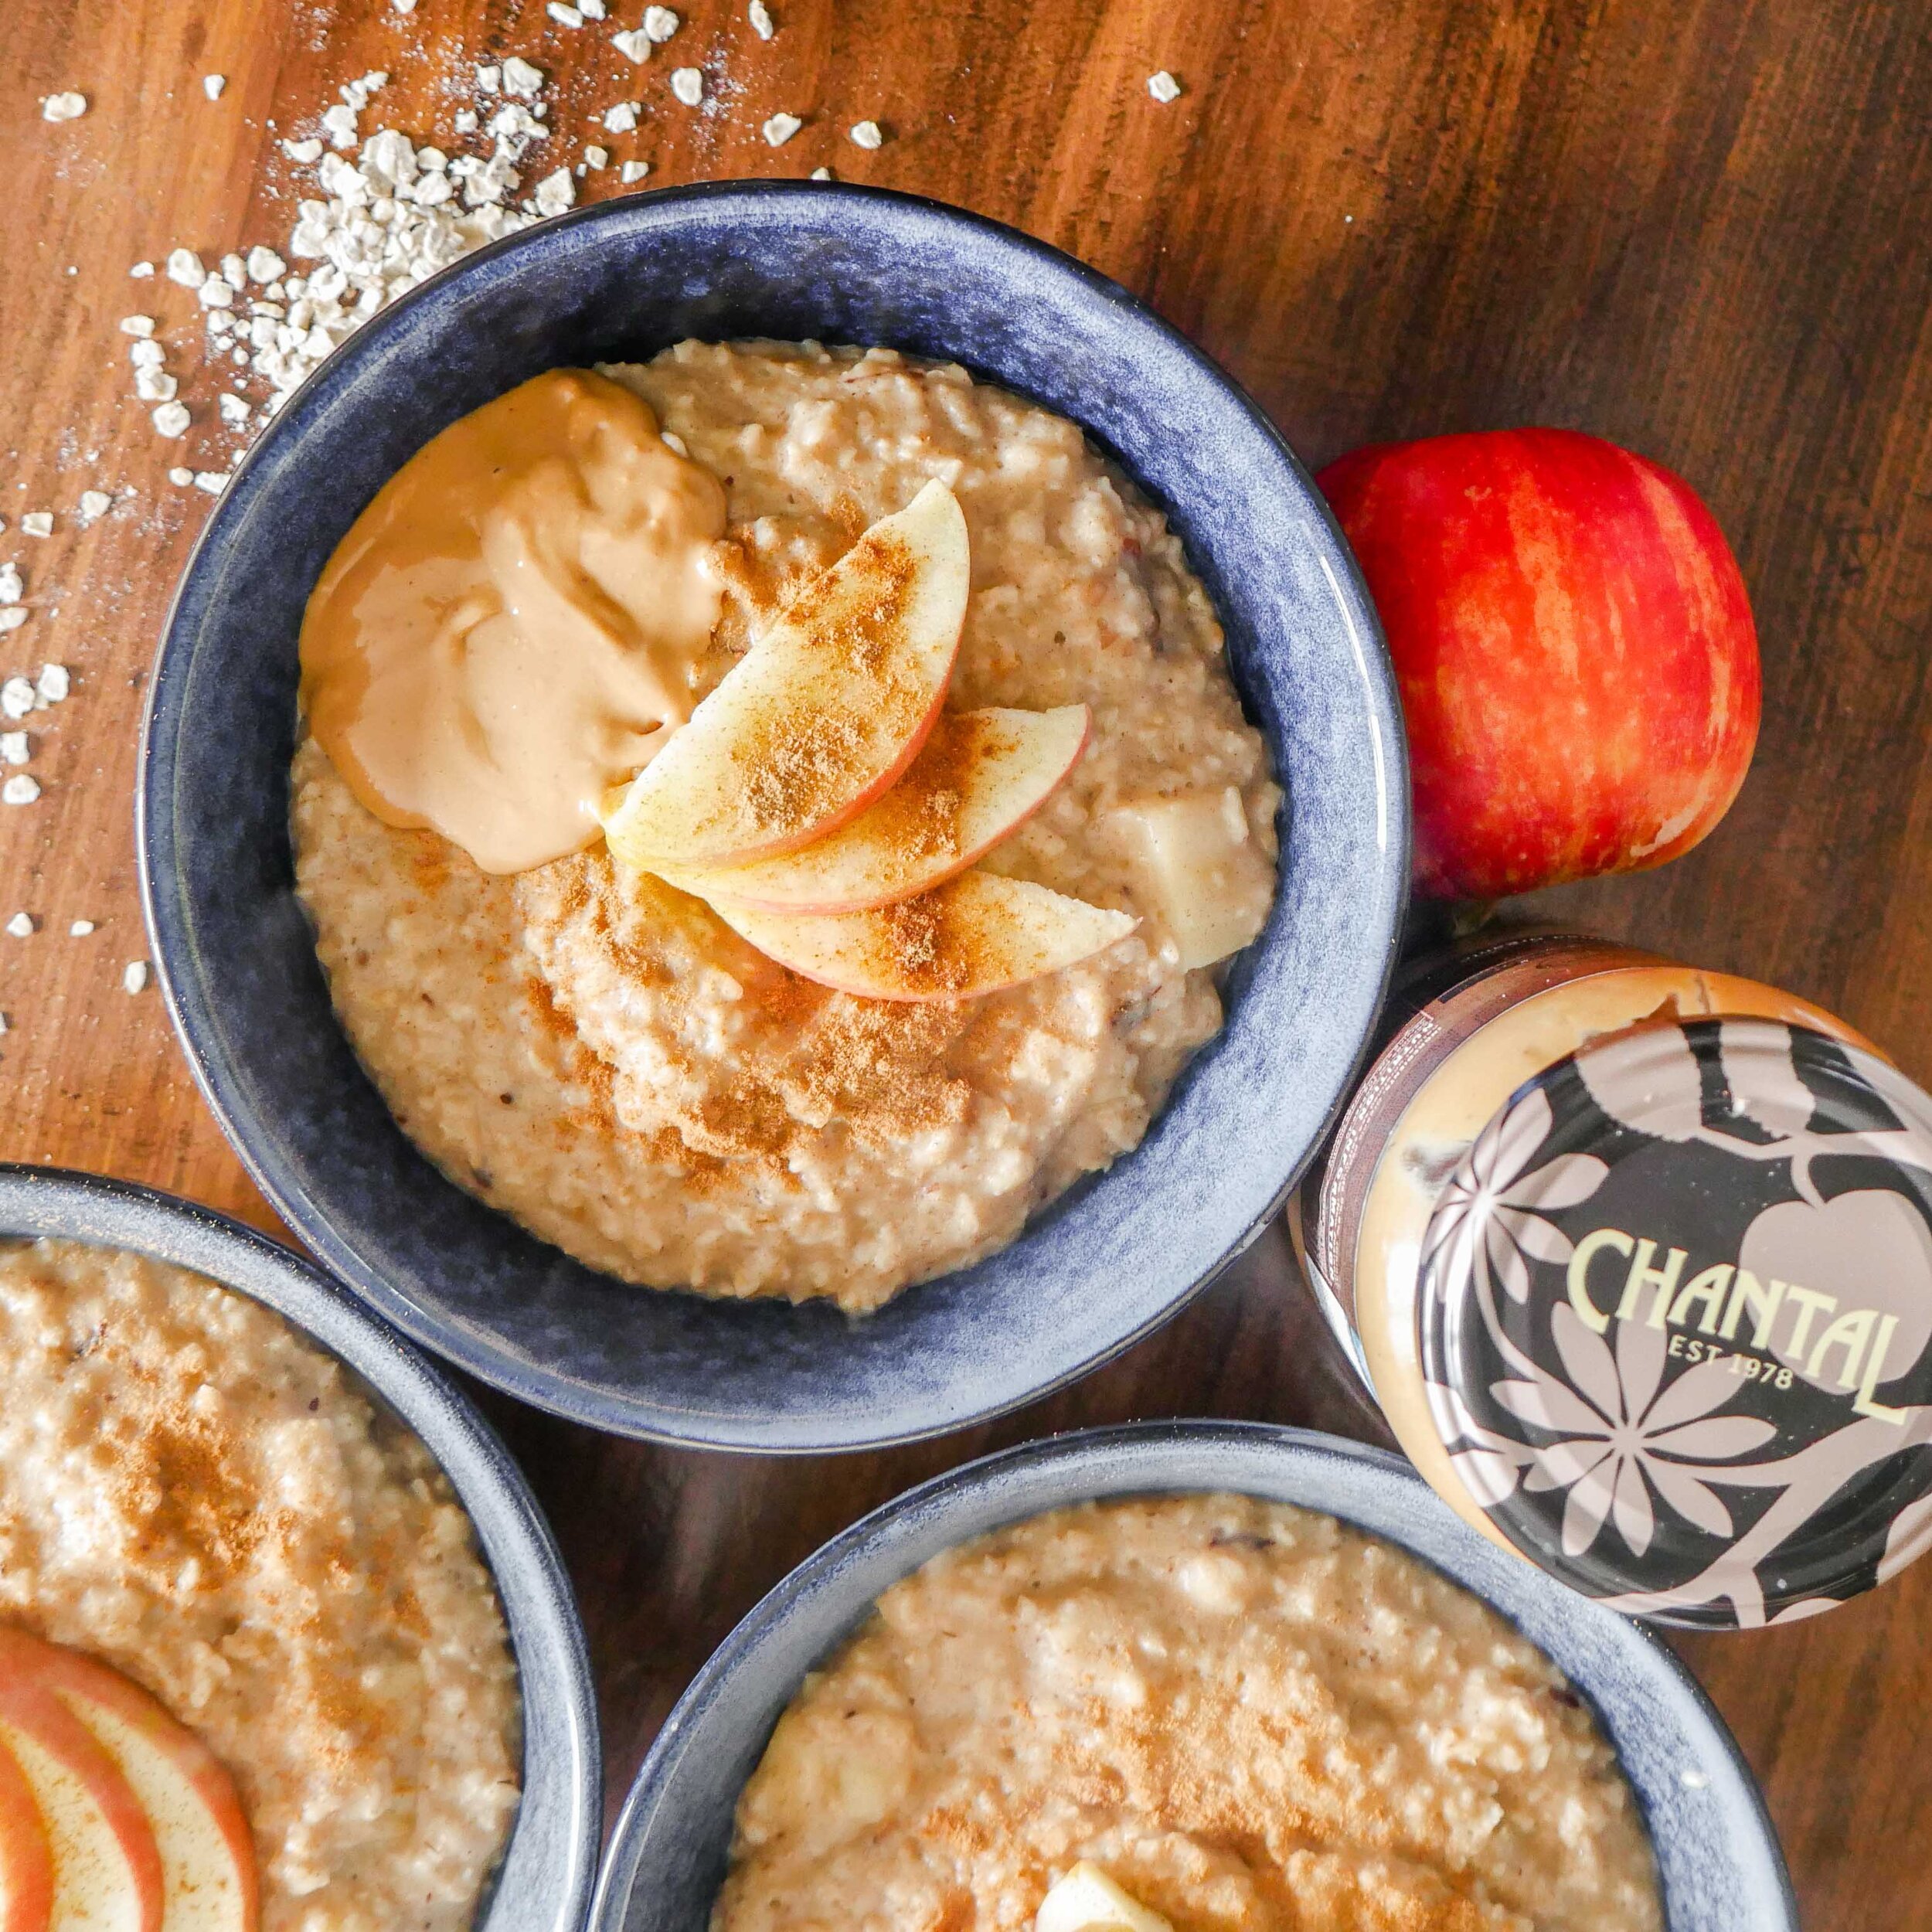
APPLE SPICED PORRIDGE

Tricked out porridge was a childhood staple of mine, filling, nutrient dense, and ever changing with the seasons. This recipe is great coming into the cooler months.

Serves 3-4

RSF, V

INGREDIENTS.

1 ½ C quick oats

1 large or 2 small apples

10 dried dates

1 tsp cinnamon

½ tsp ground ginger

3 C boiling water (more or less depending on desired consistency)

Splash or two of oat mylk

For toppings

1-2 TBSP Chantal Organics smooth peanut butter

extra sliced apple

pinch of cinnamon

coconut sugar to taste

METHOD.

  • Peel your apples and chop them into little bite sized cubes.

  • Chop dates into little pieces.

  • Put all ingredients (apart from oat mylk and 1C water) into a medium sized saucepan on a med-low heat.

  • Stir frequently allowing the steam to escape as the oats cook down.

  • Add remaining boiling water as you go to change the consistency to your preference.

  • Right before serving stir in the mylk to add some creaminess and cool the oats down.

  • Pour into a bowl and add your toppings to serve.


BUCKWHEAT BANANA BREAD

with date caramel.

GF, RSF, V

INGREDIENTS.

Dry Ingredients:

1 ½ C buckwheat flour

2 tsp baking powder

½ C coconut sugar

1tsp cinnamon

Wet Ingredients:

2 chia/flax eggs (1TBSP ground seeds and 4TBSP water = 1 egg)

¼ C neutral oil (coconut, sunflower or canola work well)

2 super ripe bananas, mashed

½ C oat mylk

For the Caramel:

1 C dried dates, pips removed and soaked in water

½ C water

Pinch of salt

METHOD.

  • Soak your dates is enough water to cover them (10+ mins in boiling water, 1+ hours in cold water).

  • Preheat an oven to 180 degrees celsius.

  • Line or grease a loaf tin.

  • Drain the dates and place all caramel ingredients in a blender and blend till smooth.

  • Combine all dry ingredients together in a large mixing bowl.

  • In a separate bowl combine all wet ingredients.

  • Create a well in the dry ingredients and pour wet ingredients in.

  • Mix to combine, the mixture will be more of a thick dough than a cake batter.

  • Pour mix into your greased loaf tin.

  • Pour date caramel on top and with a butter knife, swirl it into the bread mix. You want to mix it reasonably well and let some of the banana bread mix show through on top.

  • Bake in the oven for 35-40mins, the loaf should pull away from the sides easily when it’s ready.

  • Allow to cool slightly before cutting.

  • Don’t eat all at once ! Or do ! I did !

 
smoothie.jpg

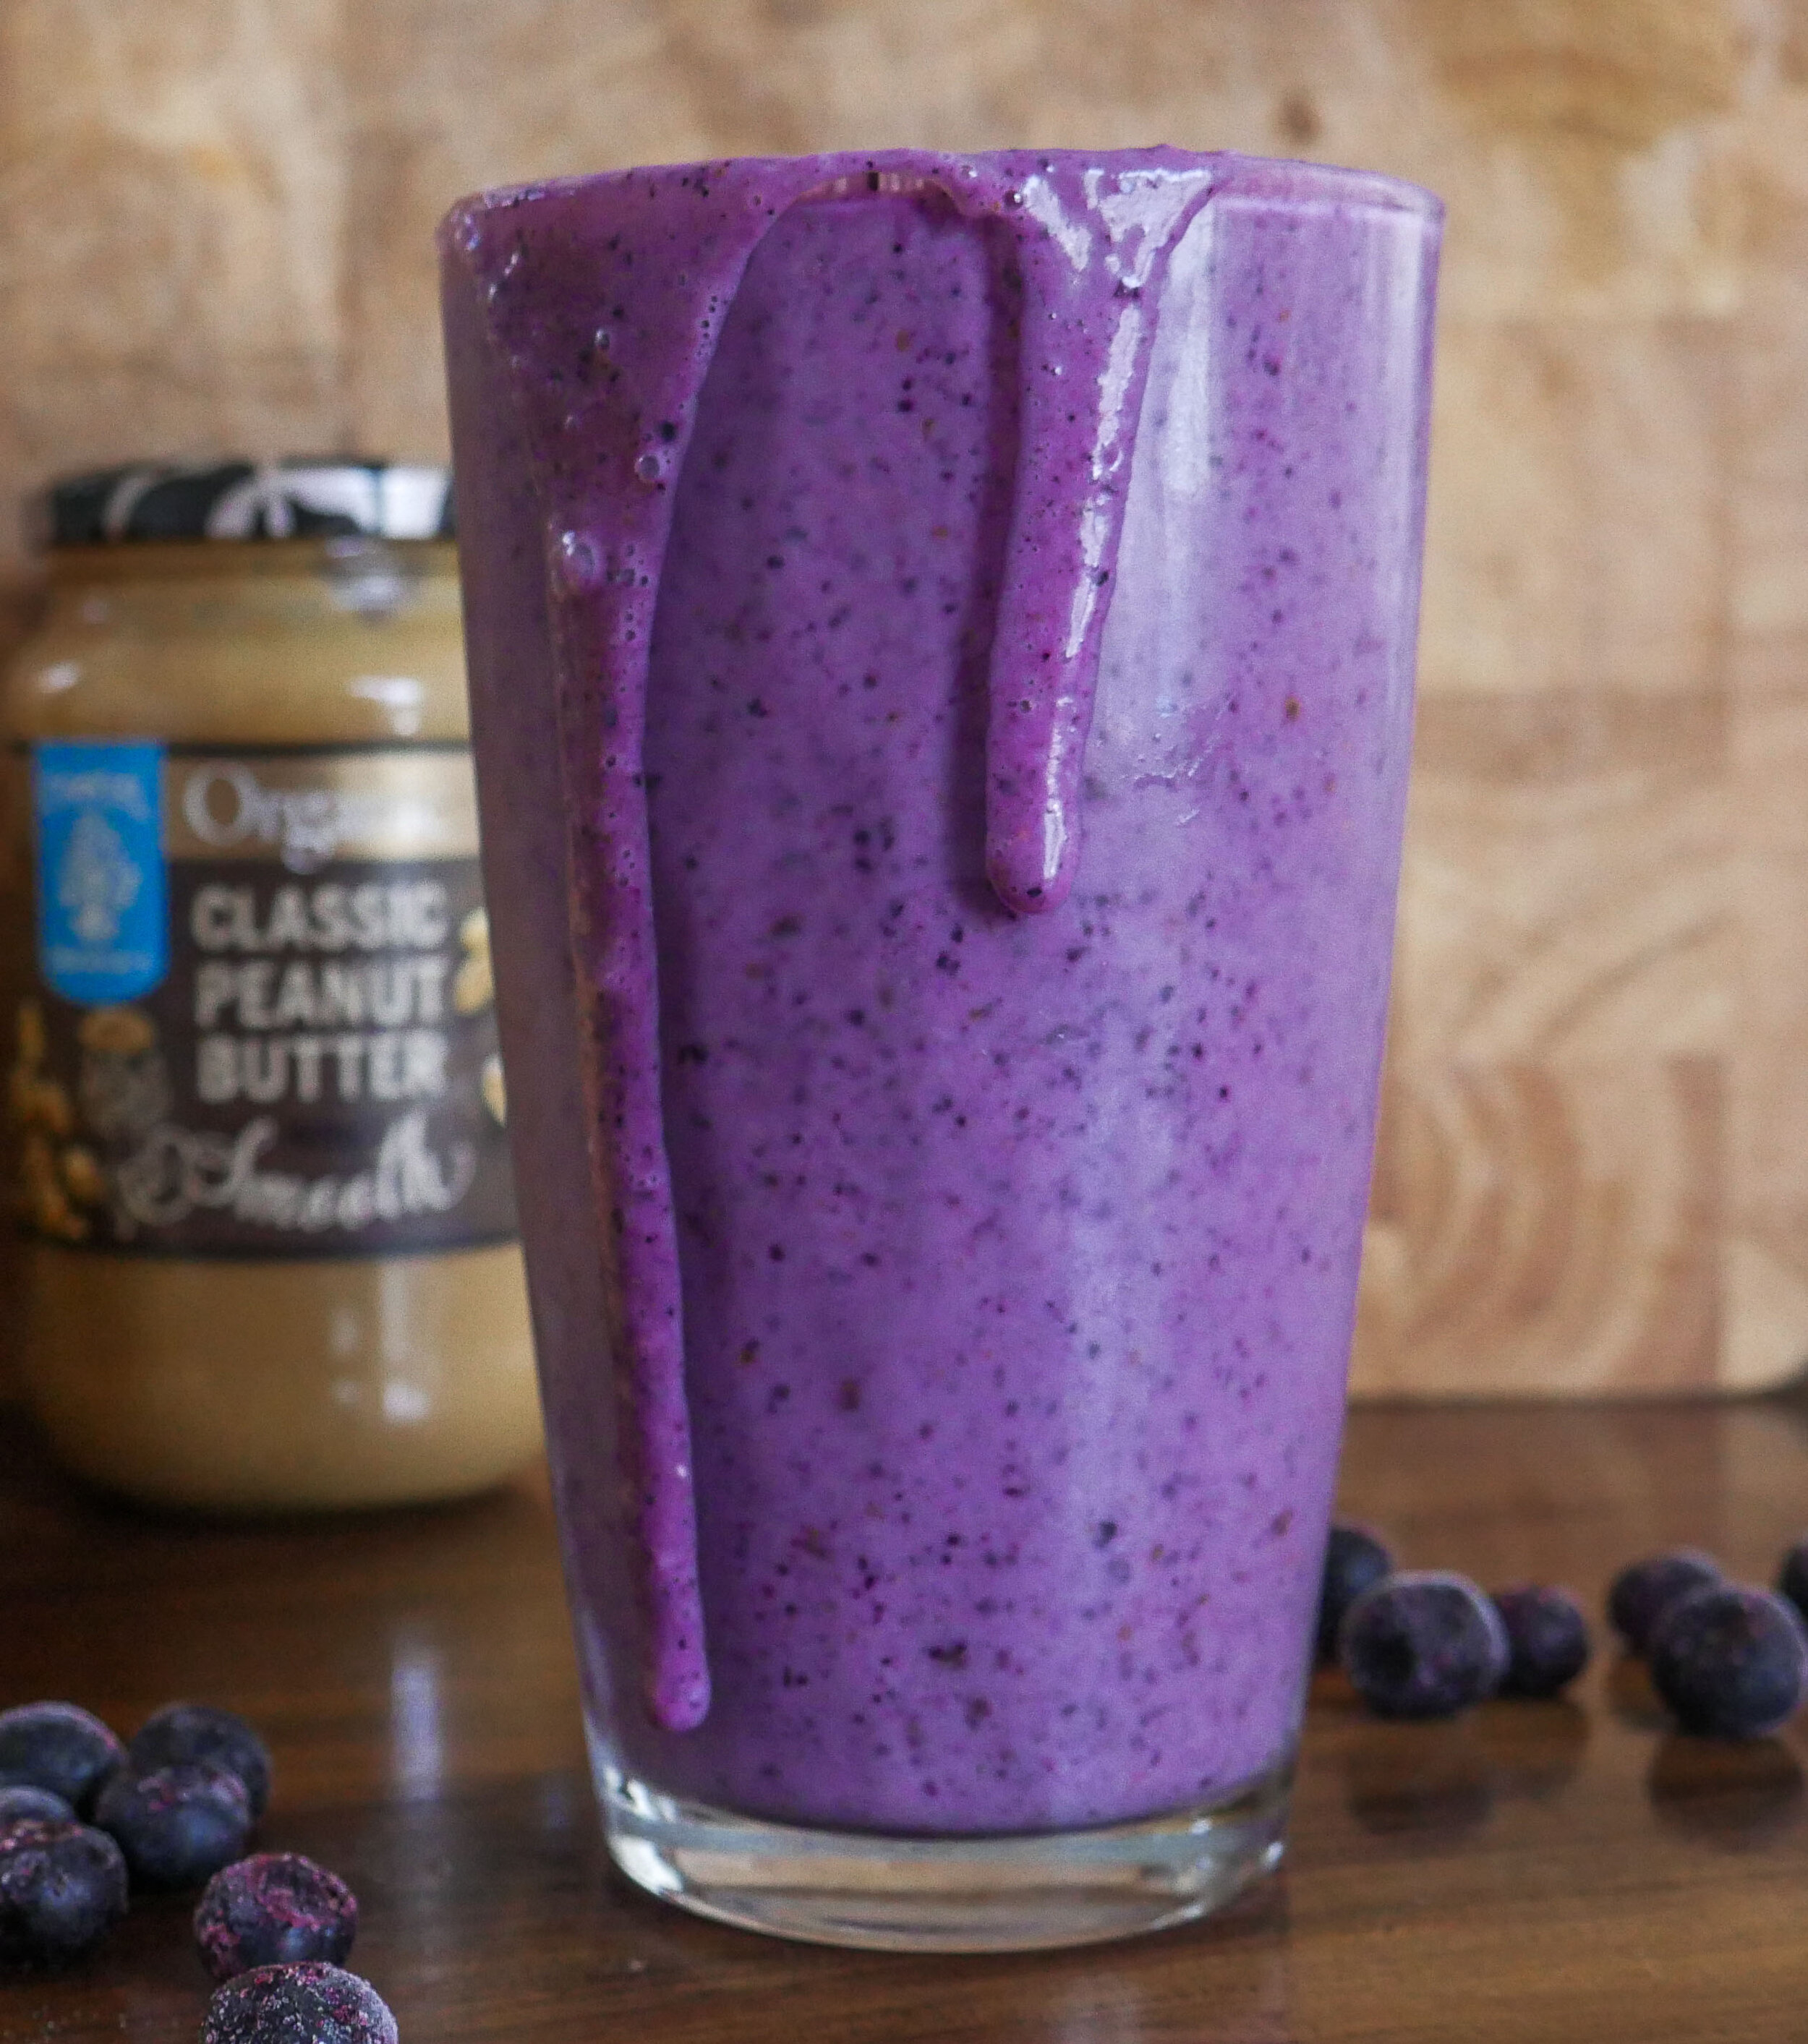
BLUEBERRY, PEANUT BUTTER & BANANA SMOOTHIE

RSF, V

INGREDIENTS.

1 banana

⅓ C frozen blueberries

1 TBSP Chantal Organics smooth peanut butter

4 dates

1 tsp chia seeds

½ - 1 ½ C oat mylk, depending on desired consistency*

METHOD.

  • Add all ingredients to a blender cup and blend till smooth.

  • Pour into a tall glass and enjoy in what’s left of the Autumn sun.

*to make a super thick smoothie add only a little mylk to begin with, adding more only as your blender needs it.

 
oat mylk.jpg

OAT MYLK

Plant Based Mylks are great in theory but they have a few downsides.

  • They only come in 1 litre tetra packs. My household will go through 4+ a week, making them not cost effective and a huge waste as tetra packs can't be recycled (at least not in Hawke's Bay)

  • They often contain stabilisers, fillers and preservatives which isn't really what you thought you were signing up for when opting for almond milk in your morning coffee.

My solution to this is a DIY oat mylk that I make whenever I can. I opt for oat as it can be made in pretty much any blender, it is super creamy, and very cost effective.

INGREDIENTS.

1C oats

5C filtered water

3 dates

Pinch of cinnamon

Pinch of salt

METHOD.

Put everything in a blender and blend until it looks all creamy.

Pass through a cheesecloth or a clean tea towel before bottling.

(I made 1.5X this recipe to use throughout this challenge)

 
porridge.jpg

BLUEBERRY OVERNIGHT OATS

A super customisable recipe that is a great easy breakfast for busy mornings, simply prepare the night before and serve in the morning.

Serves 3.

RSF, V

INGREDIENTS.

½ C oats

3TBSP chia seeds

2TBSP sunflower seeds

5 dates, in small pieces

½ tsp cinnamon

Handful of frozen blueberries

Leftover blended oats from oat mylk recipe (optional)

Oat mylk to fill jar

Banana to serve

METHOD.

  • Put all dry ingredients in a jar. You want it to be about half full, feel free to adjust oat and chia quantities to suit the size of your jar.

  • Fill jar to the top with oat mylk (or milk of choice).

  • Give it a good stir then leave in the fridge overnight.

  • Serve it in the morning with a fresh banana.


Homemade natural food colouring

Natural icing made from plants for the Chantal Shop blog.jpg

We wanted to share the most basic, cheapest method to make the food colourings. There are other methods which require things like a juicer and a dehydrator, but not everyone has those. The boil method yields beautiful hues, it's fun and easy enough for the kids to help out.

You can use plant powders mixed into whatever you’re making and they generally result in much punchier colour. This is because you can only add very limited liquid to a recipe before you alter the composition. Store bought artificial colourings are highly concentrated and only require a few drops. But it's difficult to get true colour from just plants without using loads of liquid.

If you have time and patience you can make your own plant powders at home. There are lots of resources online to help with this.

When making these colours we’ve shared below you will need to taste as you go. And just add colourings into what you're making a little at a time. Take care with the blue, the baking soda can shine through.

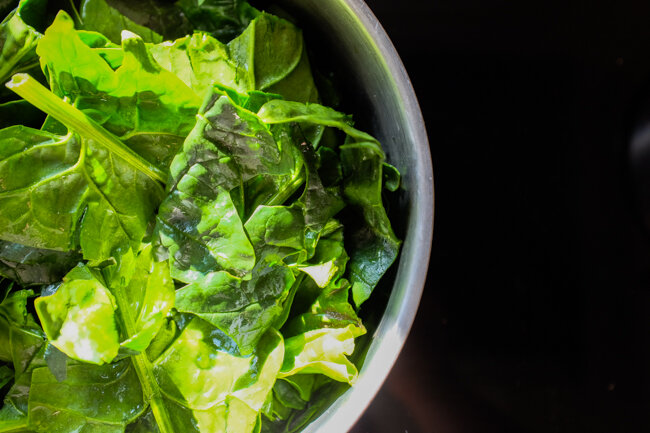
We found the beetroot to be the most rewarding, the colour is rich and intense, and the flavour non-obtrusive. Green was the trickiest, we have had more success using matcha powder to get a much brighter green without the 'green' taste of the spinach shining through.

Homemade natural food colouring for Channtal Shop blog.jpg

Recipes.

Red
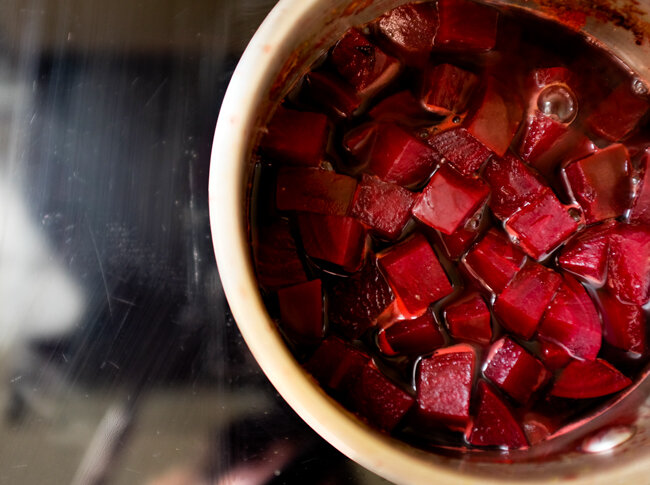
2x medium beetroot
1 1/2 cups water

  • Chop the beets into small cubes and put into a saucepan small enough so the beets are covered with water.

  • Bring to the boil, then reduce to a simmer.

  • The liquid will reduce down, so make sure you keep an eye on it. And add a tad more water if necessary.

  • Cook until the beets are tender, and you are left with a few tablespoons of liquid. This is your food colouring.

  • Make a delicious salad with the cooked beets, cress or rocket, parsley, a handful of walnuts and a mustard and lemon dressing.


Orange
1 tsp turmeric powder
1/2 cup water

  • In a small pot bring the turmeric and water to a boil.

  • Simmer for 7-10 minutes.

  • Cool completely and store in an airtight container for up to 1 week.

  • If you have a juicer then another option is carrot juice, which gives a lovely orange colour and subtle flavour.


Yellow
1/2 tsp turmeric
1/2 cup water

  • Follow the directions for orange above.


Purple
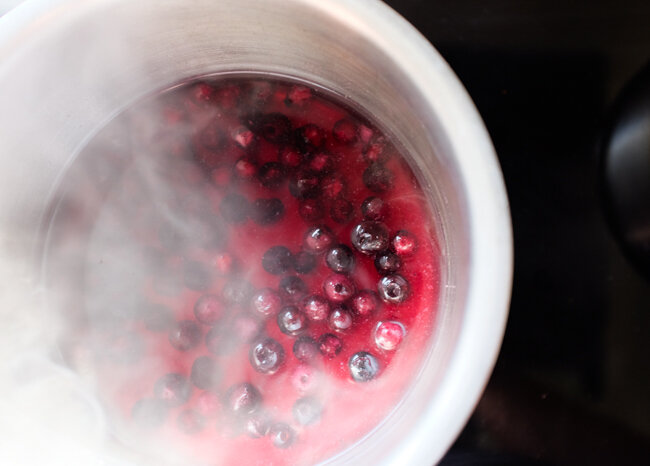
1/2 cup blueberries
1/2 cup water

  • Bring the blueberries and water to a boil in a small saucepan.

  • Reduce to low and simmer for 15 minutes.

  • Mash the berries as they cook.

  • Leave the berries to cool down in the pan, then strain the liquid into an airtight container, and store in the fridge up to one week.


Blue
1/2 red cabbage
baking soda
about 2 cups water

  • Chop up the cabbage into thin strips and put into a saucepan with the water.

  • Bring to the boil, then reduce to medium heat.

  • Simmer until the cabbage is limp and overcooked like grandma use to make.

  • Leave the cabbage to cool in the pan, then once cool strain liquid into an airtight container and store in the fridge for up to one week.

  • Start by adding a little baking soda to the liquid at a time until you achieve the blue you want.

  • Remember to taste as you go!

  • If you leave the baking soda out you have a lovely purple dye.

Natural icing made from plants.jpg

Aquafaba Mayo

Mayonaise made with chickpea brine aquafaba for the Chantal Shop blog Napier New Zealand.jpg

Aquafaba mayonaise.


Next time you open a can of chickpeas stop before you tip the liquid down the drain, that stuff is liquid gold. It's your ticket to the fluffiest mousse, the creamiest mayo and the lightest pancakes. The mayo we are sharing is delicious smothered in a sandwich, in potato salad, dolloped over nachos, with fritters, or on wedges!

Aquafaba is the name given to the liquid left over from cooking legumes and beans. This liquid is used in place of eggs to emulsify, foam, blend, and thicken.

It can be used in both savoury and sweet recipes. We're excited to share our easy mayo we have been making for years. It's deliciously tangy and creamy, but if you don't like too much tang then just half the lemon juice.

You will need a blender for this recipe. A small one like a ninja or NutriBullet is the perfect size and does the job in seconds. If you have an immersion blender that will also do the job, but will take a longer blend time.

RECIPE - makes about one and a half cups.

  • 250mls rice bran oil (or any neutral oil, we find rice bran the best though)

  • 60mls *chickpea brine (aquafaba)

  • 1 TBS dijon mustard. We’ve used wholegrain too, just has a bit more texture

  • 30mls lemon juice (1 lemon), or 15ml white vinegar

  • White pepper if you're fancy, black if you're like most people and that's all you have

  • 1/2 tsp rice bran syrup (optional)

METHOD

  • Put all the ingredients into your blender and blend for about 20 seconds, then have a look.

  • If the mayo is thick and creamy and sticking to the lid and blades you can head off on your happy way to mayo heaven.

  • If it's still runny try blending for longer to see if that fixes it.

  • If not, add another couple of tablespoons of aquafaba, and blend again. In our experience this fixes it every time.

  • * We have had great success using any bean brine, cannellini, kidney, butter etc. Also the water from tofu can be used, although we haven't tried it.

  • If you are new to using aquafaba use canned chickpeas to start. You can use the liquid from beans you have cooked yourself at home, but the results may not be so consistent.

Make sure you head online and check out all the amazing things which can be done with this humble ingredient. It has a cult following!

Basil Season

Out the back of the Chantal shop it’s a bit like a rabbit’s warren - twists and turns- little rooms tucked away, one off the other.

When basil season rolls around, crates of the fragrant herb arrive from the back laneway, and start getting washed and processed in produce.

The herbaceous fragrance wafts and weaves its way through every room. You can hear staff exclaim as it hits their noses. It’s really very wonderful.

Basil is an excellent source of vitamin K and manganese; also high in copper, vitamin A, vitamin C; and has smaller amounts of calcium, iron, folate, magnesium and omega-3 fatty acids.

It is best picked and used fresh. But we know that isn’t always possible, so we’ve got an easy basil storing solution for the months it isn’t in season. Buy it in summer when it’s cheap and plentiful and you’ll be enjoying delicious pastas, pizza and sauces all year round.

BASIL FREEZING METHOD:

Fresh organic basil being chopped. For the Chantal shop blog..jpg

Simply wash and gently pat dry your basil, then chop it however fine you like.

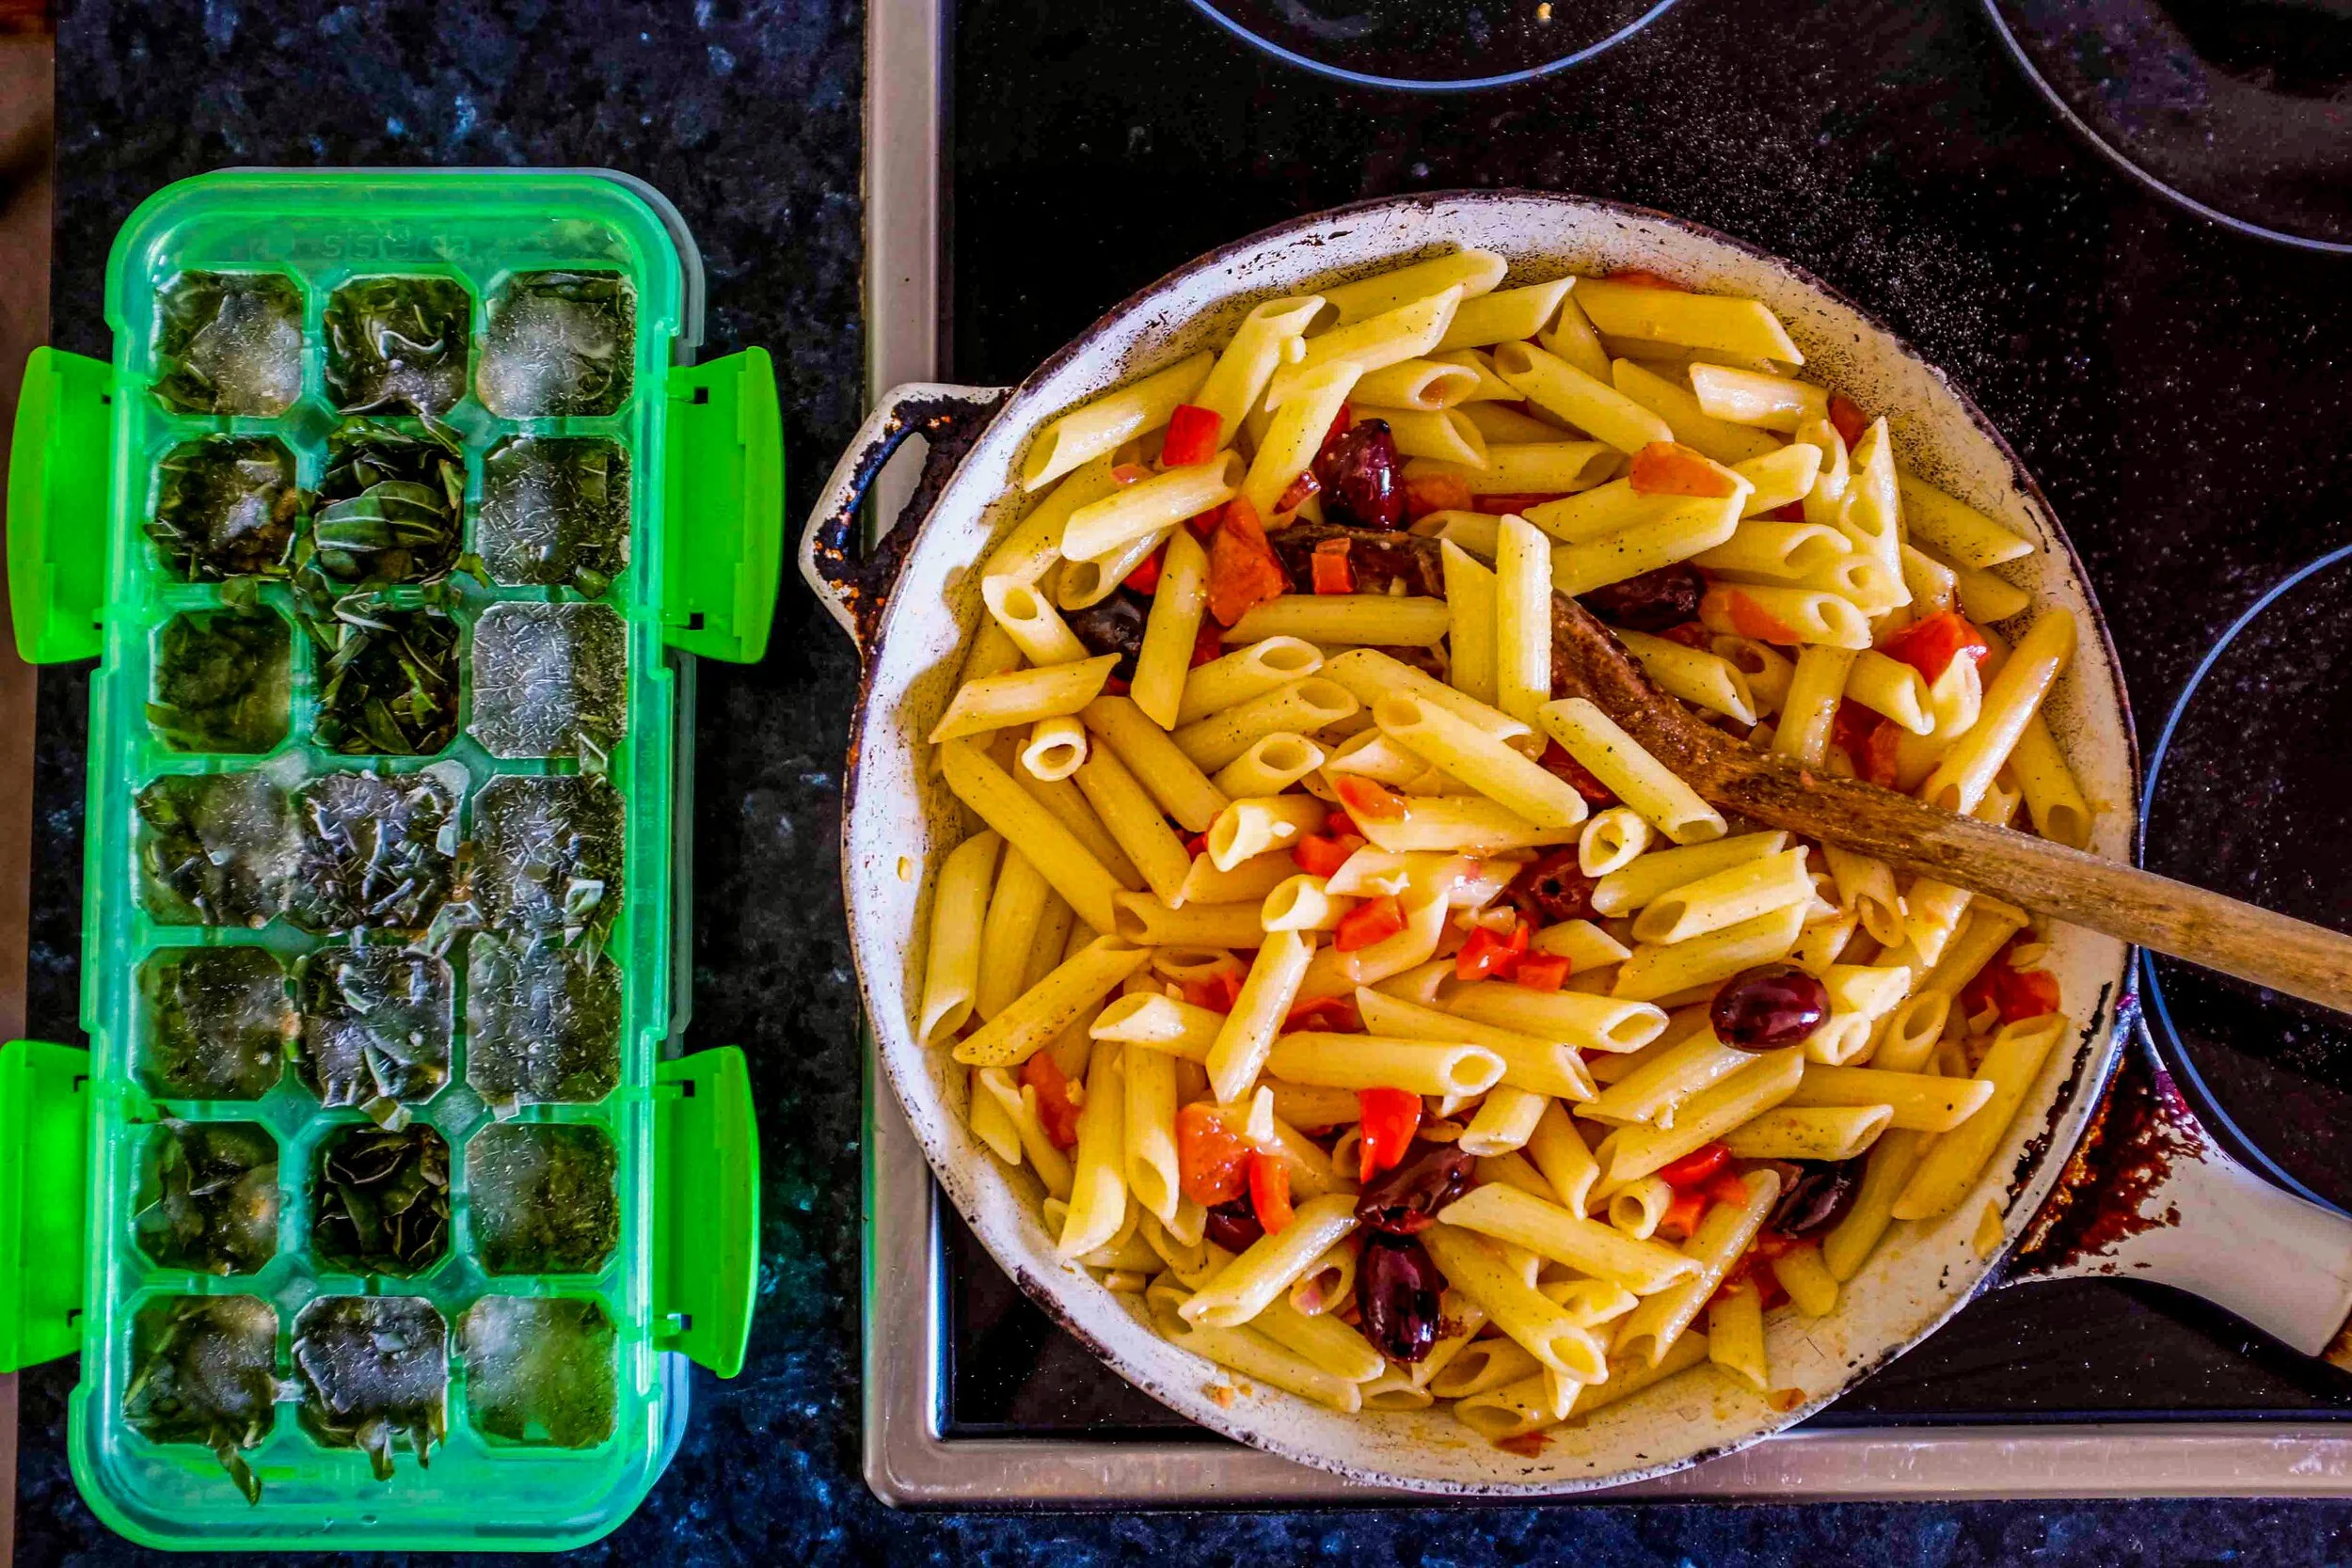
Pack the chopped basil into ice cube trays, top with water, and place in the freezer. Done!

Frozen organic basil from Chantal Shop Napier New Zealand..jpg

Add the frozen basil cubes to your food at the end of cooking. It retains its vibrant green colour which is a bonus of preserving it this way.

Let us know in the comments any other successful ways you have preserved basil.